It seems to me that a lot of the clutch rattling issues on all these GS bikes were as a result of the clutch hub shifting laterally on the spline because the clutch hub and clutch hub spacer were of different dimensions. In the later '83 and onwards GSX1100/GS1150 bikes, Suzuki addressed this by introducing a shim into the build that would remove the slack. This shim came in 4 different sizes and is still available from Suzuki. Here's how to measure the slack and dry build it: (click on images to enlarge)
On a flat surface, start with the oil pump gear and the bearing and spacer for it:

Put the clutch hub on top of this making sure the 2 notches on the oil pump gear fit into the appropriate holes in the clutch hub:


Then add the clutch spacer and bearing.


At this point you will see that there is a lip here. Where the clutch spacer does not end up flush with the clutch hub.

This is where the shim comes into play.

Drop it into the middle.

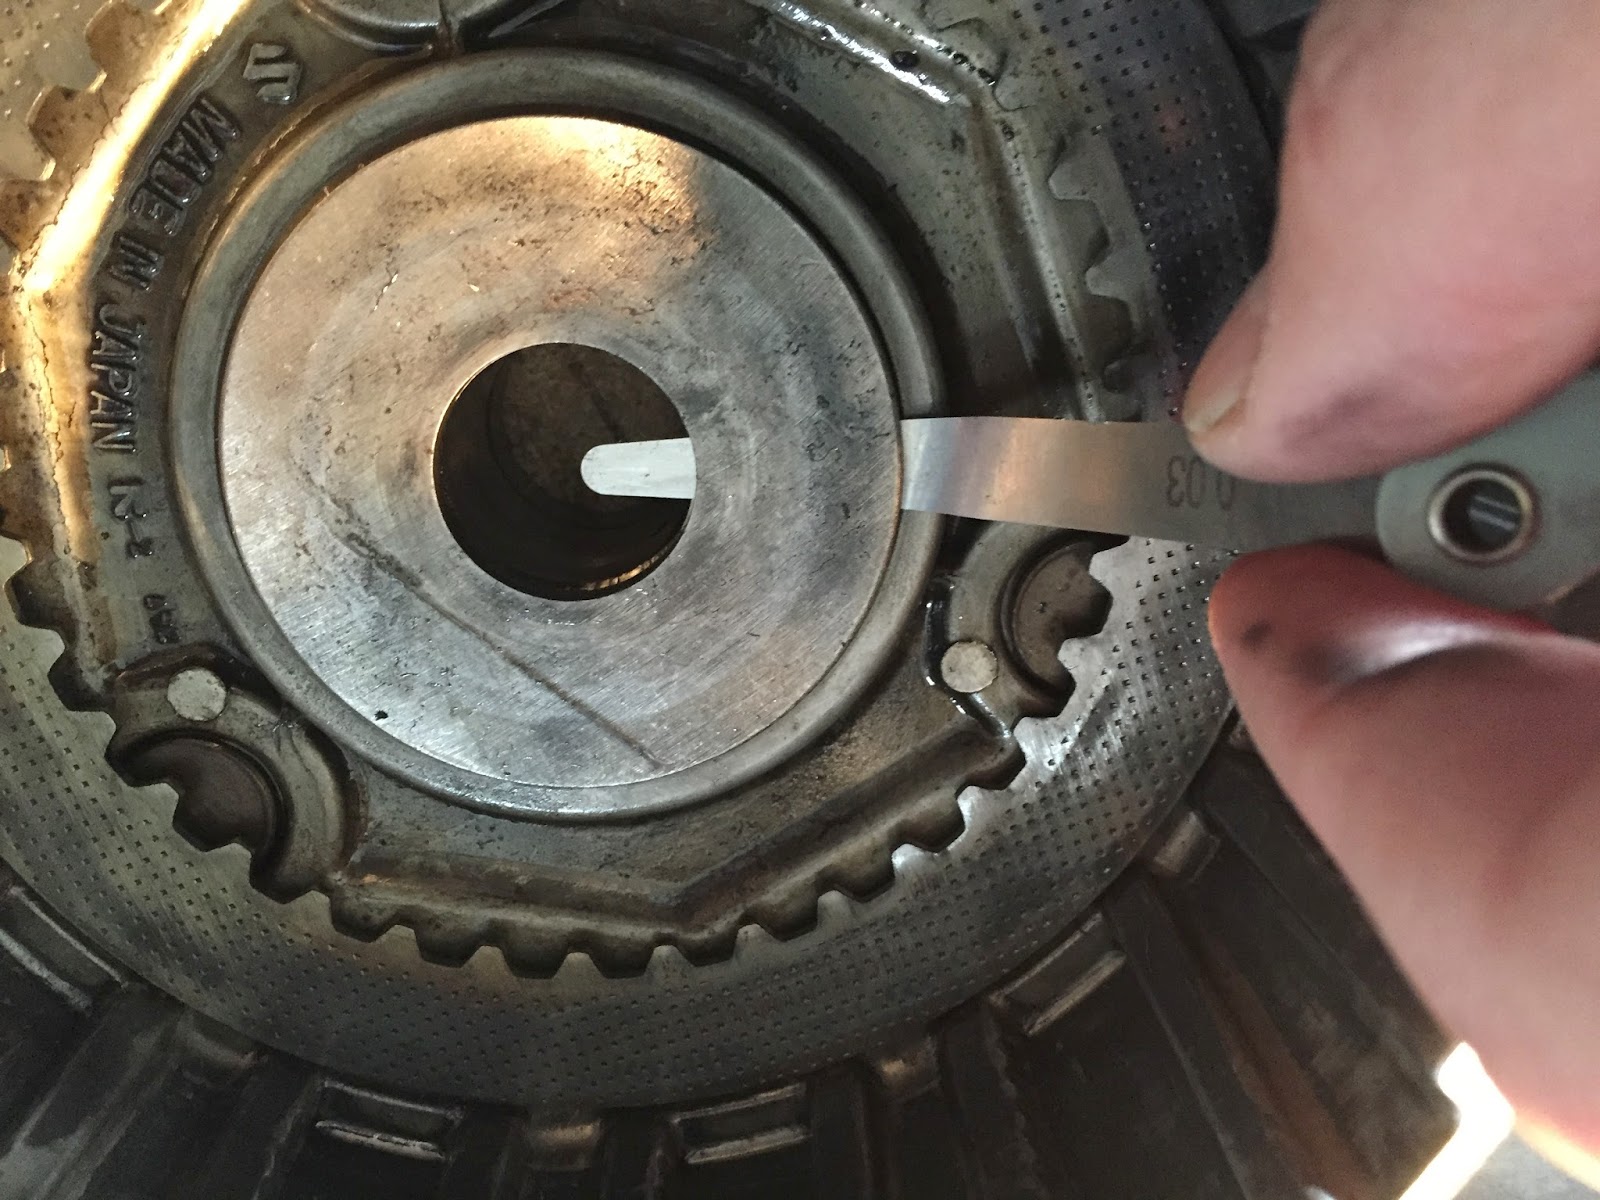
And put the thick washer on top.

This is the gap you are measuring and it should be between 0.03 mm and 0.08 mm.
And again without the top washer.

Change the shim to ensure you are within the standard thrust clearance range.